Configuring Single Sign-On on Microsoft Entra ID
For Microsoft Entra ID, you can use a directory for SAML configuration. Specify the users and groups to be allowed to use SAML-based login.

In addition to the SAML-based single sign-on, single sign-on with Microsoft Entra ID also provides OpenID Connect-based single sign-on. OpenID Connect-based single sign-on is easy to configure, and also supports automatic synchronization. Before you configure SAML-based single sign-on, see "How to configure OpenID Connect-base single sign-on".
How to configure OpenID Connect-based single sign-on
 In "Login Settings" of "Tenant Info", specify "All" or "Microsoft 365 account".
You will be able to coordinate an account with a Microsoft 365 account in "Initial Login as a General User", "External Service Login Coordination" in "My Account Settings", or Synchronizing IDs.
 Configure the account coordination.
You can now log in to this site with your Microsoft 365 account.
1. Creating an enterprise application
 Create an enterprise application.
 On the left pane, click [Single sign-on], and for "Select a single sign-on method", click [SAML].
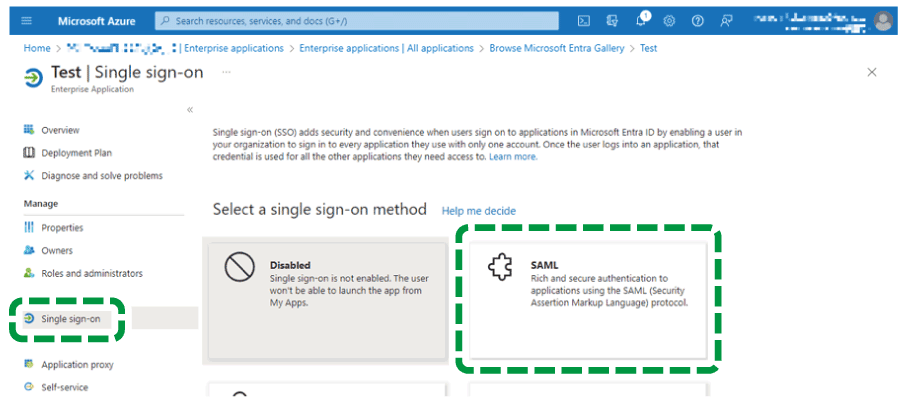
 Click [Edit] for "Basic SAML Configuration".

 Configure the following settings as shown below:
Item name on Microsoft Entra ID | Value to be specified |
|---|---|
Identifier (Entity ID) | Copy the Entity ID from "SAML Coordination Settings" in your "Tenant Information" at this site, and then paste it into this field. |
Reply URL (Assertion Consumer Service URL) | Copy the Reply URL (Assertion Consumer Service URL) from "SAML Coordination Settings" in your "Tenant Information" at this site, and then paste it into this field. |
Logout Url (Optional) | Copy the Logout Url from "SAML Coordination Settings" in your "Tenant Information" at this site, and then paste it into this field. |
Others | (Omissible) |
 Click [Save].
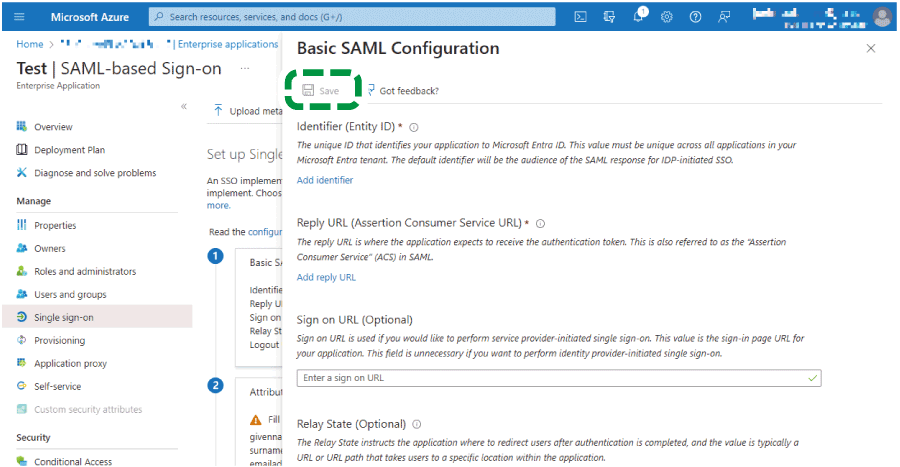
 Configure attributes and claims.
Proceed to "2. Configuring attributes and claims".
2. Configuring attributes and claims
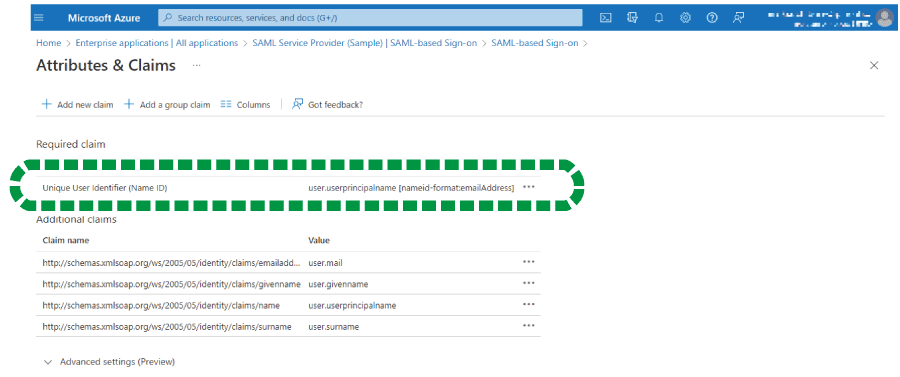
 Click [Edit] for "Attributes & Claims".

 Click [Unique User identifier (Name ID)].
 From the "Source attribute" drop-down list, select "user.mail", and then click [Save].
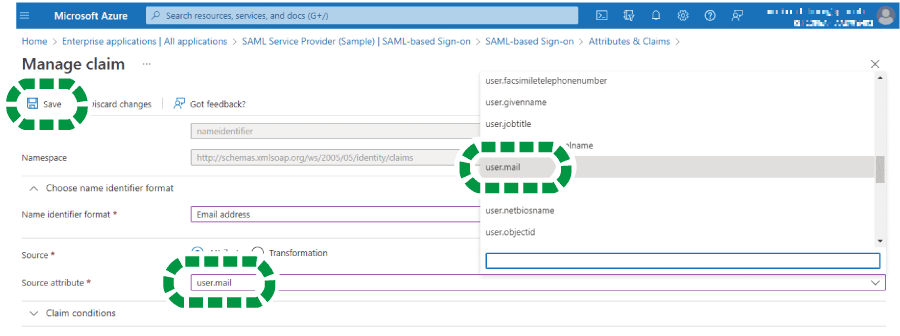
 Configure whether or not to synchronize a user's first and last names.
To synchronize a user's first and last names during single sign-on, proceed to "If a User's First and Last Names are to be Synchronized". For not synchronizing, proceed to "If a User's First and Last Names are not to be synchronized".
If a User's First and Last Names are to be Synchronized
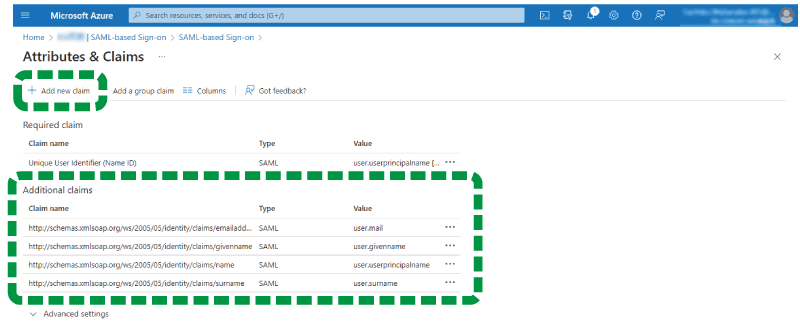
Check that the following given name and surname claims are configured as additional requests.
Claim name
Type
Value
http://schemas.xmlsoap.org/ws/2005/05/identity/claims/givenname
SAML
user.givenname
http://schemas.xmlsoap.org/ws/2005/05/identity/claims/surname
SAML
user.surname
If they are not configured, click [Add new claim].
Otherwise, proceed to step 3.

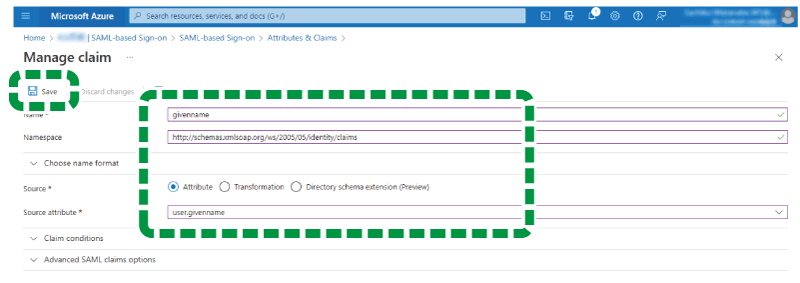
Add the given name as shown in the table below and save it.
Item name on Microsoft Entra ID
Value
Name
givenname
Namespace
http://schemas.xmlsoap.org/ws/2005/05/identity/claims
Source
Attribute
Source attribute
user.givenname
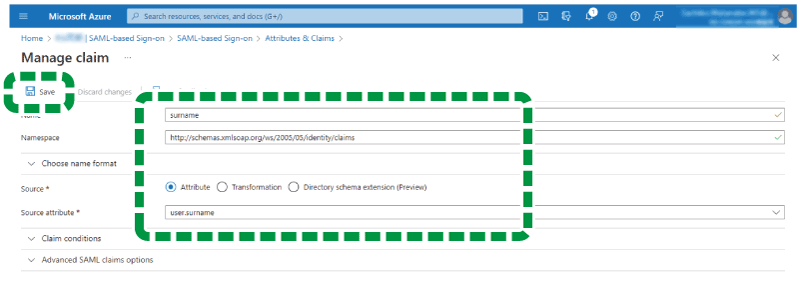
Add the surname as shown in the table below and save it.
Item name on Microsoft Entra ID
Value
Name
surname
Namespace
http://schemas.xmlsoap.org/ws/2005/05/identity/claims
Source
Attribute
Source attribute
user.surnname
Configure SAML coordination.
Proceed to "3. Configuring SAML Coordination”.
If a User's First and Last Names are not to be Synchronized
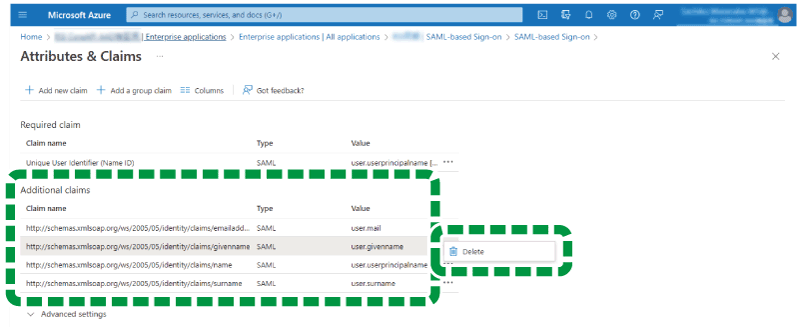
Check that the following given name and surname claims are configured as additional requests.

Claim name
Type
Value
http://schemas.xmlsoap.org/ws/2005/05/identity/claims/givenname
SAML
user.givenname
http://schemas.xmlsoap.org/ws/2005/05/identity/claims/surname
SAML
user.surname
If they are configured, delete the settings.
If they are not configured, proceed to the next step.
Configure SAML coordination.
Proceed to "3. Configuring SAML Coordination".
3. Configuring SAML Coordination
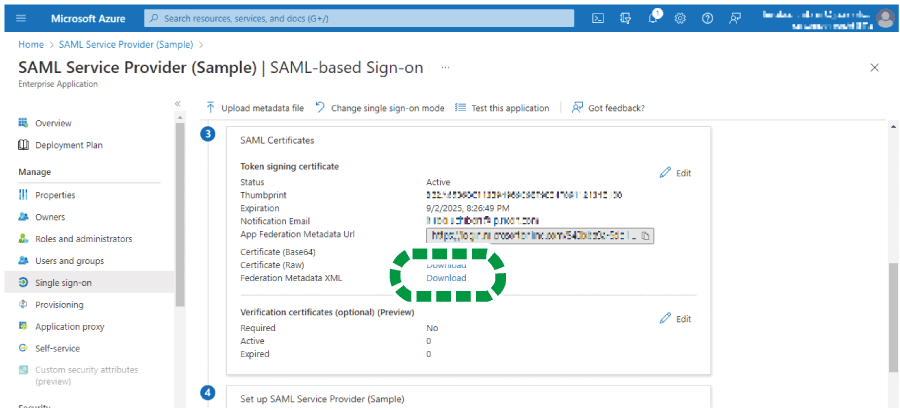
 On "SAML Certificates", click [Download] for "Federation Metadata XML".
 Open "SAML Coordination Settings" of your "Tenant Info" at this site on a different screen of your web browser.
 Click [Set as Metadata].
 Click [Select File], and then upload the XML file downloaded on step 1.
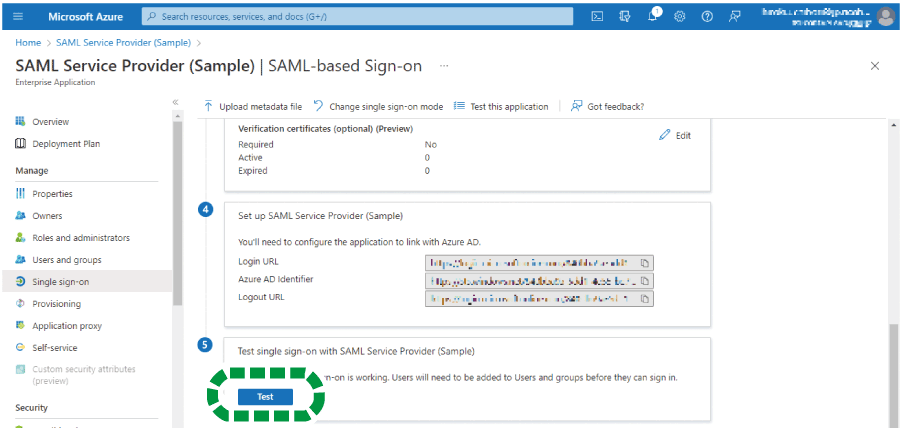
 After completing step 4, click [Test].
 Configure user access to the enterprise application.
Proceed to "4. Configuring user access to an enterprise application".
4. Configuring user access to an enterprise application
Configuring this allows users in the Microsoft Entra ID directory to use SAML-based log in.
To give all users access:
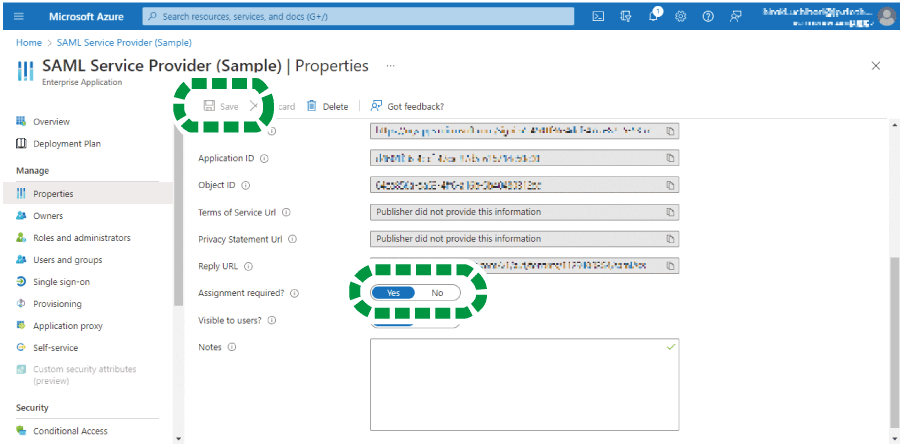
 On the left pane, click [Properties].
 Set "Assignment required?" to [No], and then click [Save].
To give specific users access:
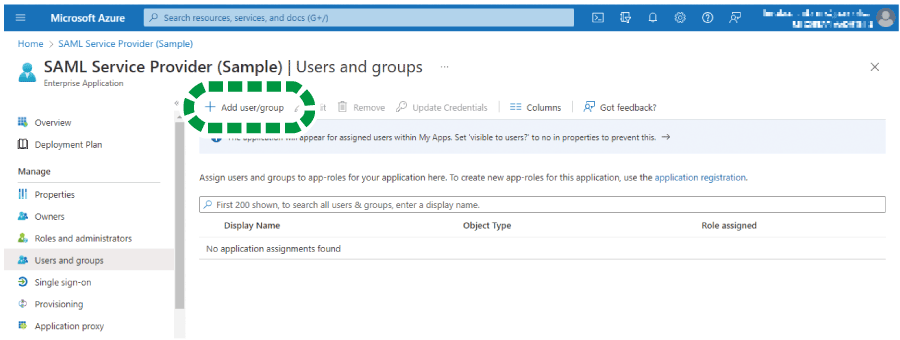
 On the left pane, click [Users and groups].
 Click [Add user/group] to specify the users or group to which they belong to be allowed to use SAML-based login.
 Configure SAML Coordination Settings at this site.
Proceed to Configuring SAML Coordination Settings at This Site.
