2. Configuring the Mapping for Provisioning
1. Supplementary procedures: Adding the department and office location attributes to attributes to be synchronized
This setting is optional.
If you want to synchronize the department attribute of an Okta user to the user's department in this site:
 Find [Department] from an attribute that is not mapped, and then click the edition button.
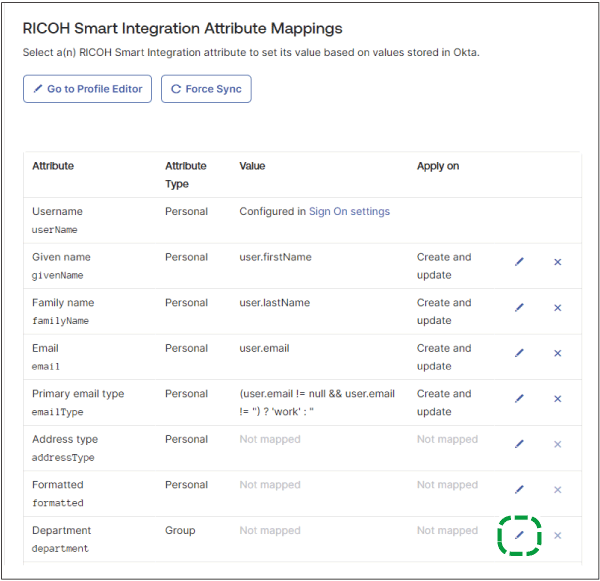
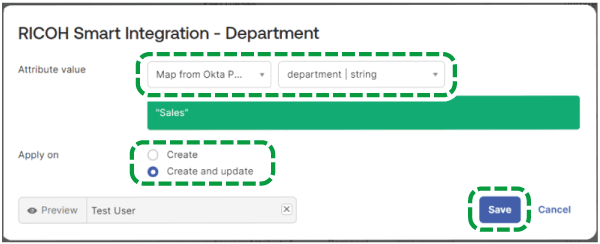
 In the edit screen, configure the following settings:
Select [Map from Okta Profile] for "Attribute value", and then select an Okta attribute to synchronize with Okta user information that can be added as a synchronization target.
Select [Create and update] in "Apply on".
Click [Save].
If you want to synchronize the postalAddress attribute of an Okta user to the user's office location in this site:
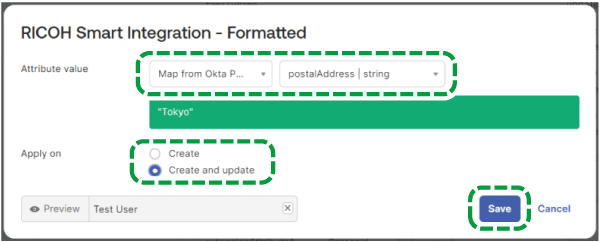
 Find [Formatted] from an attribute that is not mapped, and then click the edition button.
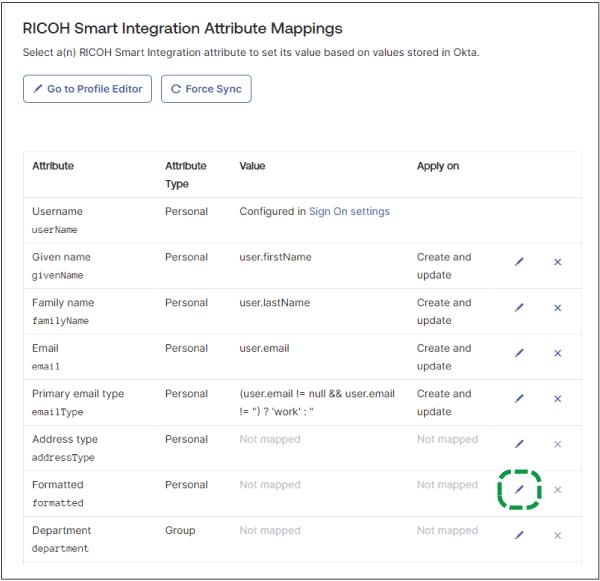
 In the edit screen, configure the following settings:
Select [Map from Okta Profile] for "Attribute value", and then select [postalAddress | string].
Select [Create and update] in "Apply on".
Click [Save].
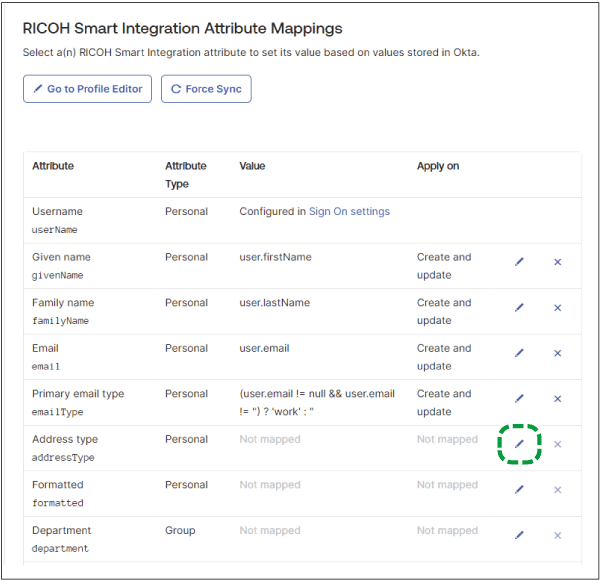
 Find [Address type] from an attribute that is not mapped, and then click the edition button.
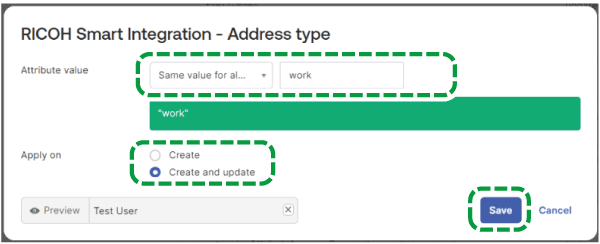
 In the edit screen, configure the following settings:
Select [Same value for all users] for "Attribute value", and then enter "work".
Select [Create and update] in "Apply on".
Click [Save].
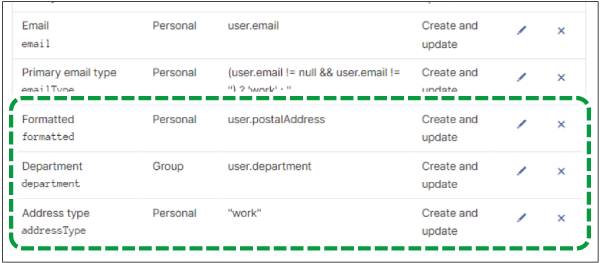
When you specify both user department and office location, they are displayed as shown below.
2. Supplementary procedures: Adding any attribute to attributes to be synchronized
This setting is optional. If you want to synchronize other Okta attributes, follow the procedure below to specify settings. You can synchronize User information in Okta that you can add as the target of synchronization to this site's user optional information 1 through 15.
 Select any attribute that is not mapped from "extensionAttribute1" to "extensionAttribute15", and then click the edition button.
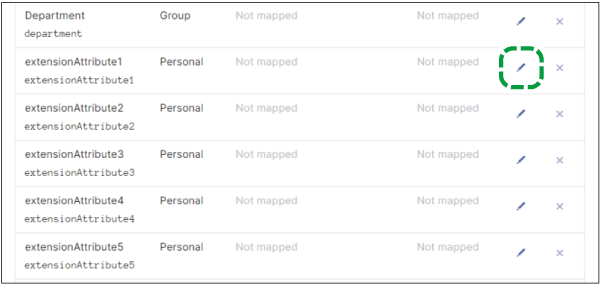
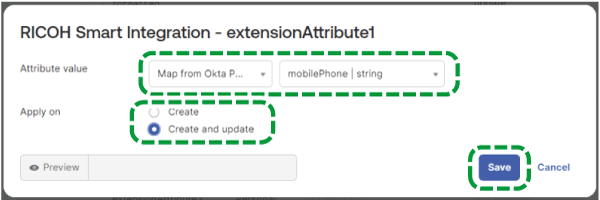
 In the edit screen, configure the following settings:
Select [Map from Okta Profile] for "Attribute value", and then select an Okta attribute you want to synchronize from Okta user User information in Okta that you can add as the target of synchronization.
Select [Create and update] in "Apply on".
Click [Save].
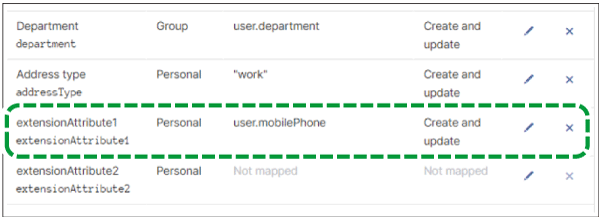
When you specify any attribute, it is displayed as shown below.
3. Supplementary procedures: Adding the Device account and the IC card to attributes to be synchronized
This setting is optional.
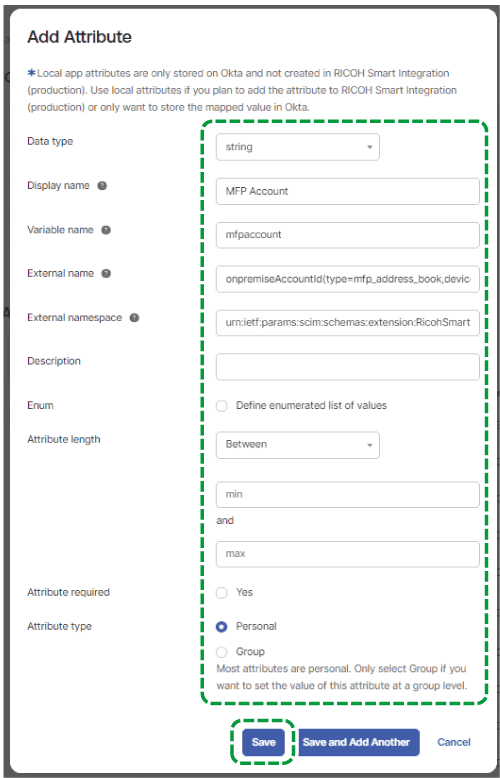
 Click [Go to Profile Editor].

 Click [Add Attribute].
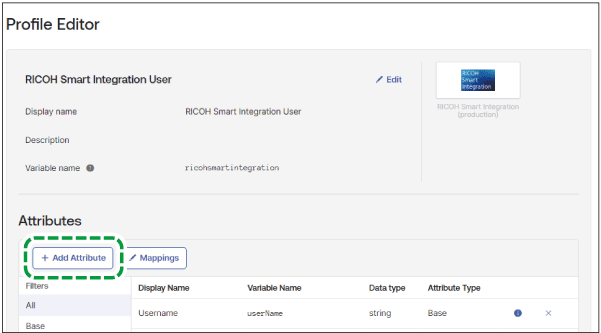
 Specify the items you want to map as shown in the following table, and then click [Save]:
Synchronized item on this site |
Display Name |
Variable name |
External name |
External namespace |
|---|---|---|---|---|
Device account of multifunction printers/copiers in the Device Account Link Settings for a user |
MFP Account |
mfpaccount |
onpremiseAccountId |
urn:ietf:params:scim:schemas: |
IC card of multifunction printers/copiers in the Device Account Link Settings for a user |
MFP IC Card {number} 1 Example: MFP IC Card 1 |
mfpiccard{number} 1 Example: mfpiccard1 |
onpremiseAccountId(type=card, Example: onpremiseAccountId(type=card, |
urn:ietf:params:scim:schemas: |
Device account of Interactive Whiteboard in the Device Account Link Settings for a user |
IWB Account |
iwbaccount |
onpremiseAccountId(type=address_book, |
urn:ietf:params:scim:schemas: |
IC card of Interactive Whiteboard in the Device Account Link Settings for a user |
IWB IC Card |
iwbiccard |
onpremiseAccountId(type=card, |
urn:ietf:params:scim:schemas: |
*1 In place of "{number}", enter a number that corresponds to the IC card 1 to 3 of the Device Account Link Settings. For details about the Device Account Link Settings, see Changing the names of the user optional information field.
 Display the [Provisioning] tab of the application again, and then click [To App].
 Among attributes that are not mapped yet, select the attribute you recently added, and then click the edition button.
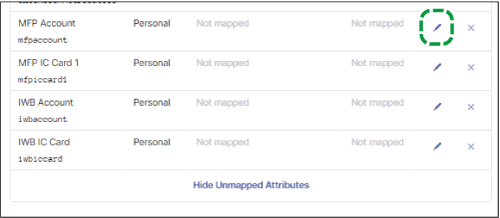
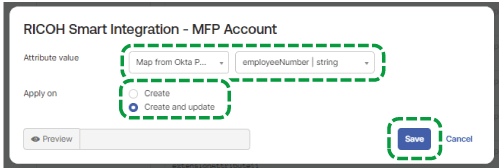
 In the edit screen, configure the following settings:
Select [Map from Okta Profile] for "Attribute value", and then select Okta attributes to synchronize with user information in Okta that can be added as targets of synchronization.
Select [Create and update] in "Apply on".
Click [Save].
When you specify those attributes, they are displayed as shown below.

4. Synchronizing users
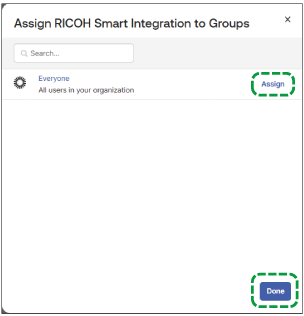
 Navigate to the screen of the application you created, and on the "Assignments" tab, click [Assign].
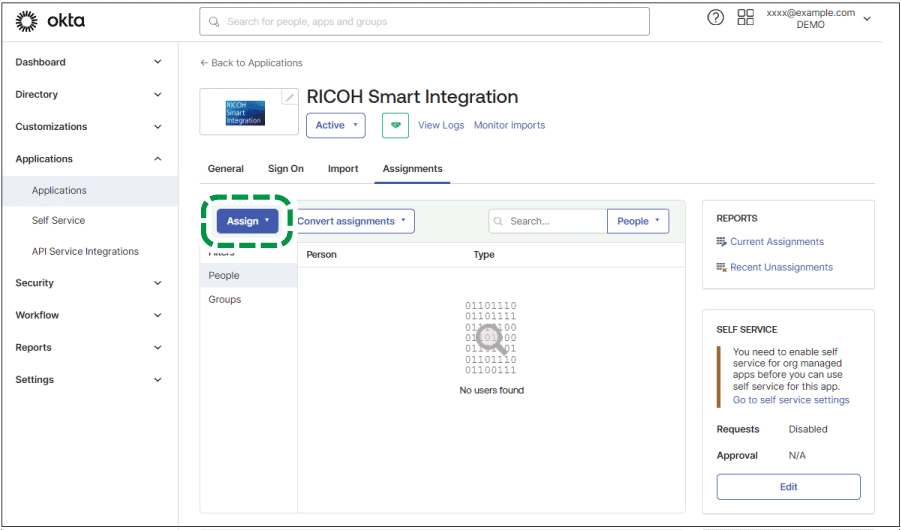
 Click [Assign] for a user or group which contains the user that will use automatic synchronization, and then click [Done].
5. Supplementary procedures: Synchronizing users that are not automatically synchronized
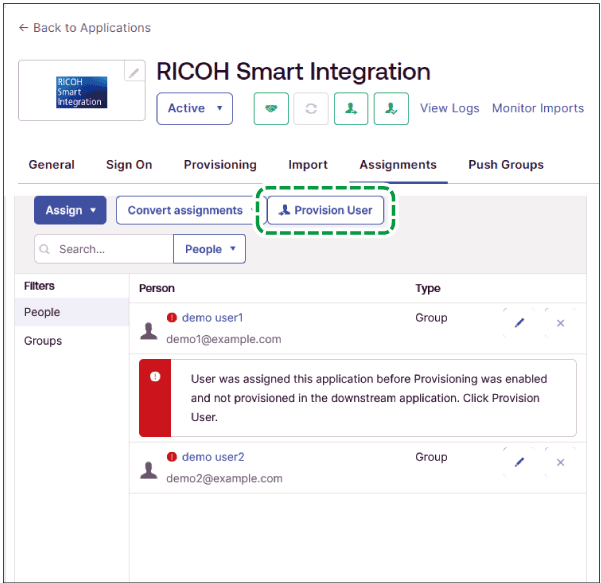
If a user is added to the application but is not automatically synchronized, for example, when the user has already been added before you configure automatic synchronization, perform the following procedure:
 Navigate to the screen of the application you created, and on the "Assignments" tab, click [Provision User].
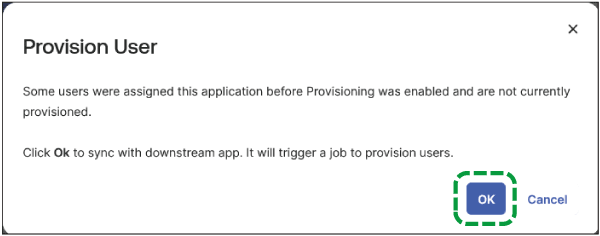
 Click [OK].
6. Synchronizing groups
Perform the following procedure to synchronize groups:
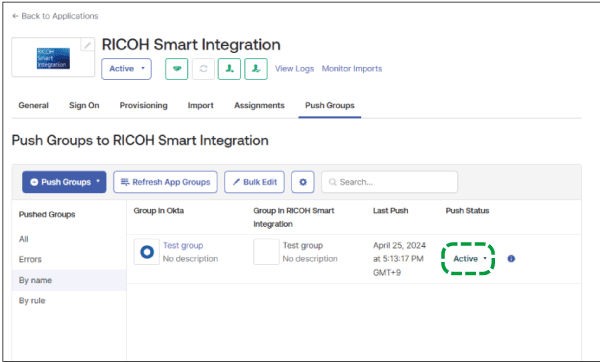
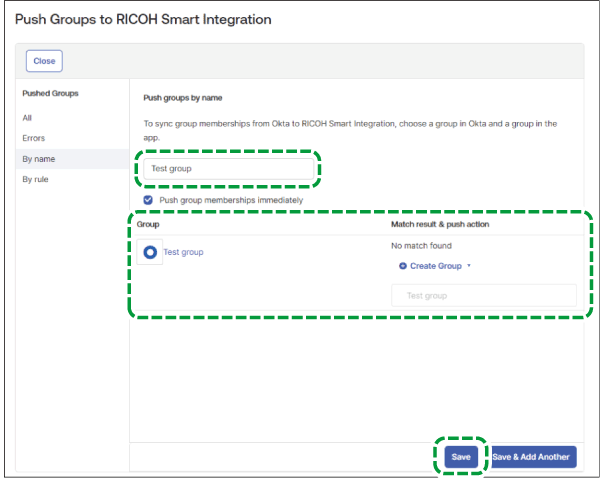
 Navigate to the screen of the application you created, and on the "Push Group" tab, click [Push Groups], and then click [Find groups by name].
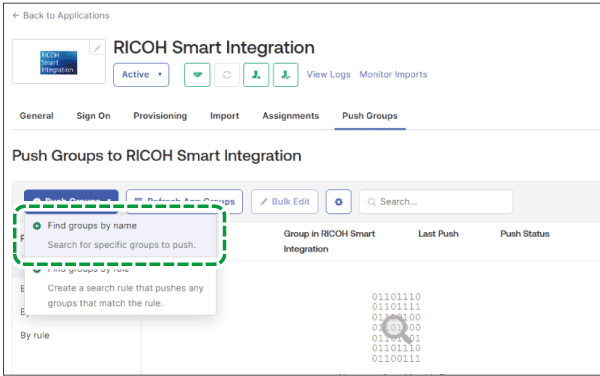
 Enter a group name to be synchronized to [Enter a group to push...] to specify a group that you will synchronize, and then click [Save].
Specify a group that satisfies all of the following conditions:
A group to which all users of the group are added to on the application in 4. Synchronizing users.
A group that is different from the group you used in 4. Synchronizing users.
If a group cannot be synchronized correctly, try the following measures:
Change the group to be added in 4. Synchronizing users to a group such as "Everyone" that contains all users, which is not used for synchronization.
Create another group that contains the same users as the group you added in 4. Synchronizing users, and then synchronize that group.
 Check that the "Push Status" for the group that you want to synchronize is set to "Active".
