
Configuring Single Sign-On on HENNGE ONE
For HENNGE ONE, you can configure the SAML settings for each individual tenant. By configuring an access policy group where SAML is enabled, the users belonging to the group can perform SAML-based login.
 Access the HENNGE Access Control admin console, and then click the "Administration" icon.
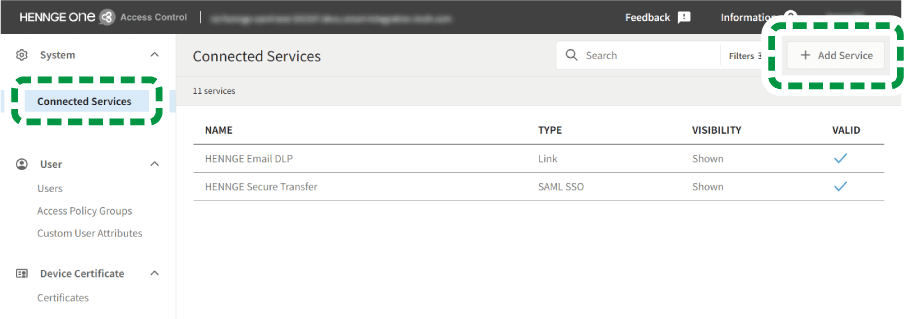
 On the left pane, select [Connected Services], and then click [Add New Service].
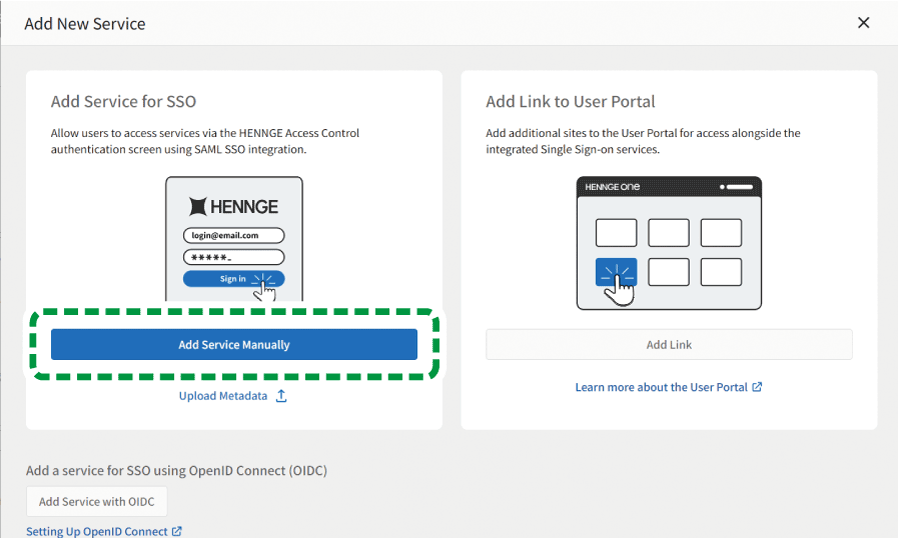
 Click [Add Service Manually] in "Add Service for SSO".
 See "SAML Coordination Settings" in your "Tenant Info" at this site to configure the fields of "Basic Configuration" as shown below.
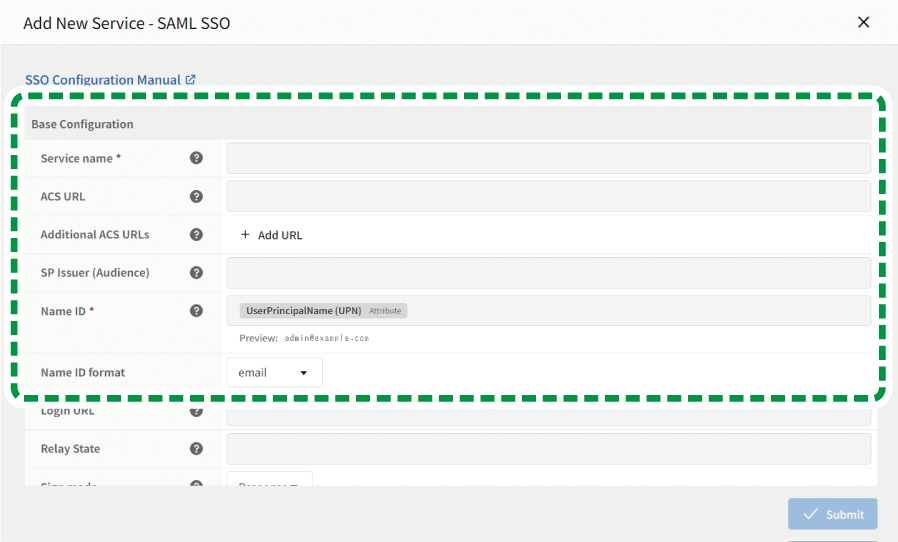
Item name on HENNGE | Value to be specified |
|---|---|
Service name | Specify any service provider name. |
ACS URL | Copy the Response URL (Assertion Consumer Service URL) from "SAML Coordination Settings" in your "Tenant Information" at this site, and then paste it into this field. |
SP Issuer (Audience) | Copy the Entity ID from "SAML Coordination Settings" in your "Tenant Information" at this site, and then paste it into this field. |
Name ID | user.email |
Name ID format | |
Others | (Omissible) |
 To synchronize your given names and surnames in single sign-on, click [Add new attribute row] in "Attribute Editor", and then configure the fields as shown below.
Otherwise, proceed to step 6. No configuration is necessary.
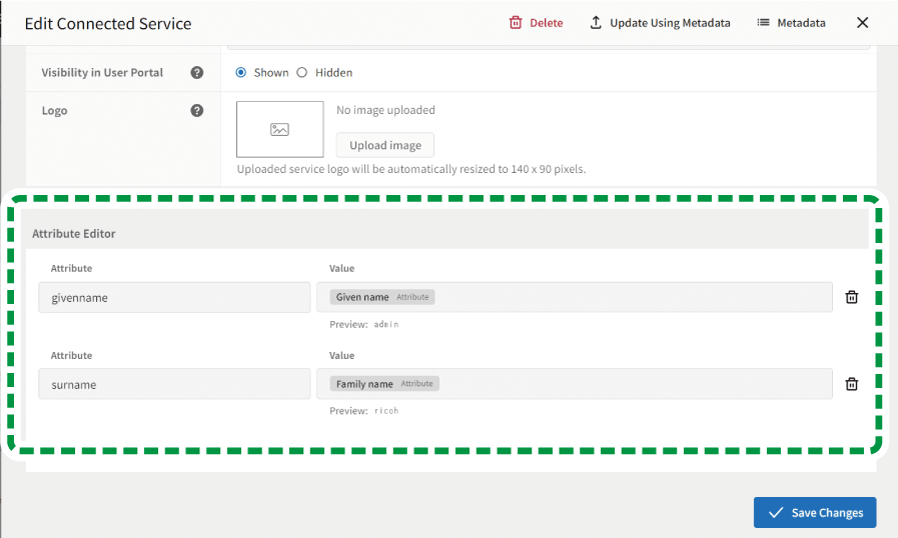
Attribute | Value |
|---|---|
givenname | Given name |
surname | Family name |
 Click [Submit].
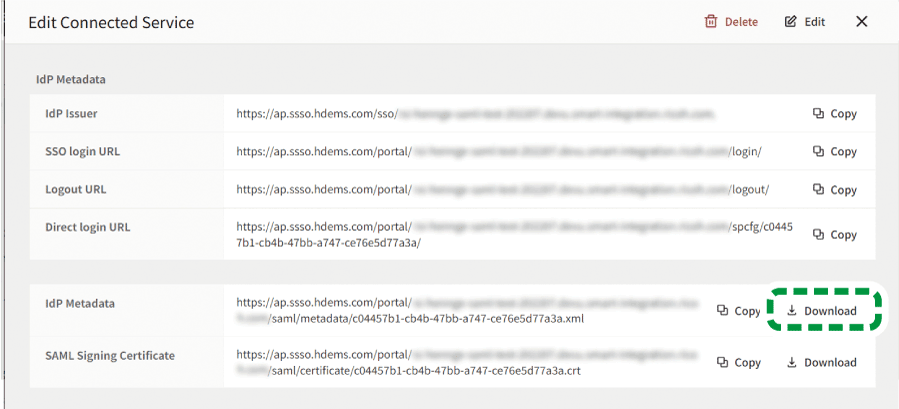
 When "Service Provider Settings" appears, click [Download] in "IdP metadata".
 Open "SAML Coordination Settings" of your "Tenant Info" at this site on a different screen of your web browser.
 Click [Set as Metadata].
 Click [Select File], and then upload the XML file downloaded on step 7.
 Give users access permissions to access the service provider.
To give users access permissions to access the service provider
On the left pane, click [Access Policy Group].
Click the name of the access policy group that the user who will use SAML for login belongs to.
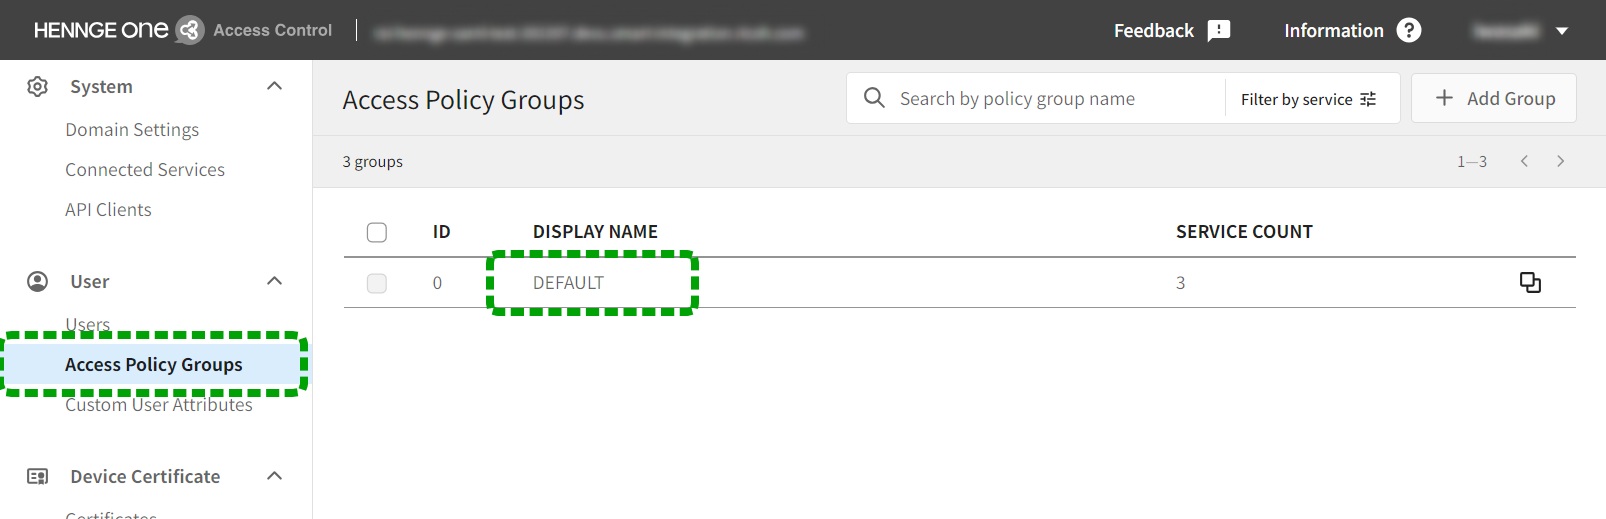
To create a new access policy group, click [New Access Policy Group] at the top right and configure settings.
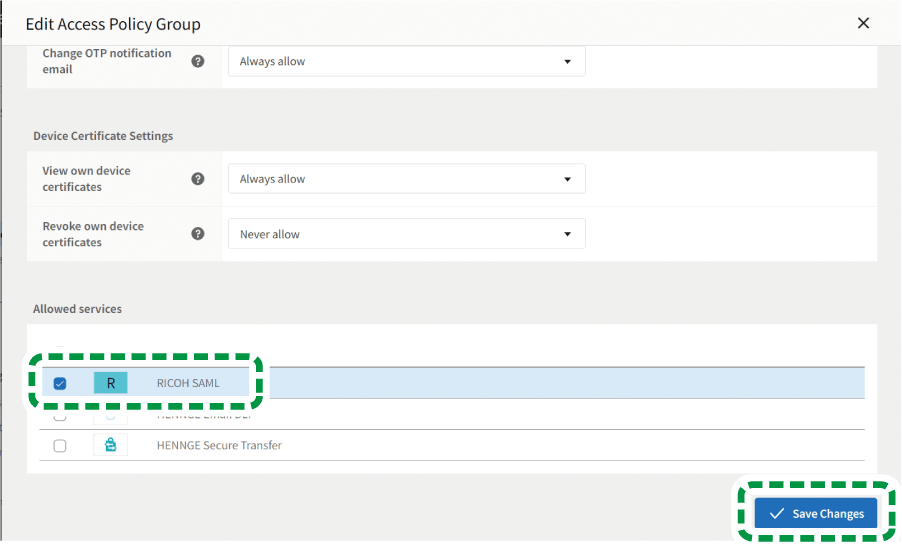
On "Allowed Services", select the service provider added on step 4 on Configuring Single Sign-On on HENNGE ONE.
Click [Save Changes].
Configure SAML Coordination Settings at this site.
Proceed to Configuring SAML Coordination Settings at This Site.