Configuring Single Sign-On (SAML Idp) that Uses RICOH Accounts
To use RICOH accounts for single sign-on, it is necessary to configure settings in advance.

This feature is only available in the following regions.
North America
Latin America
Asia Pacific
EMEA
South Korea

For details about the SAML setting procedure on the service provider side, see the manual of the service provider.
Registering Service Provider Information
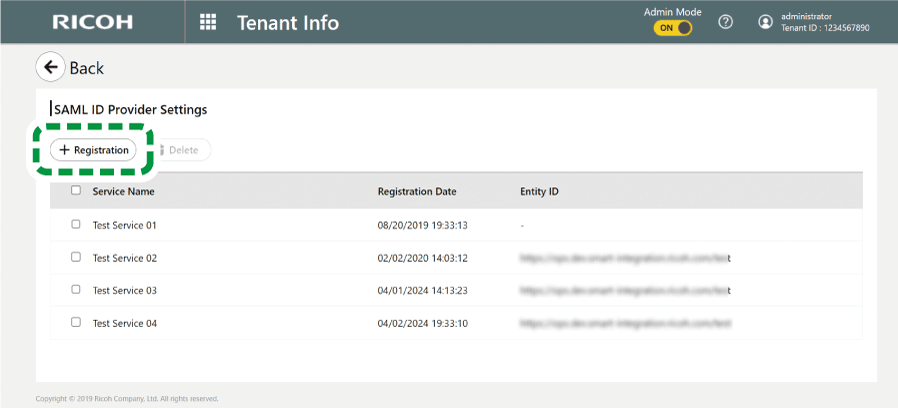
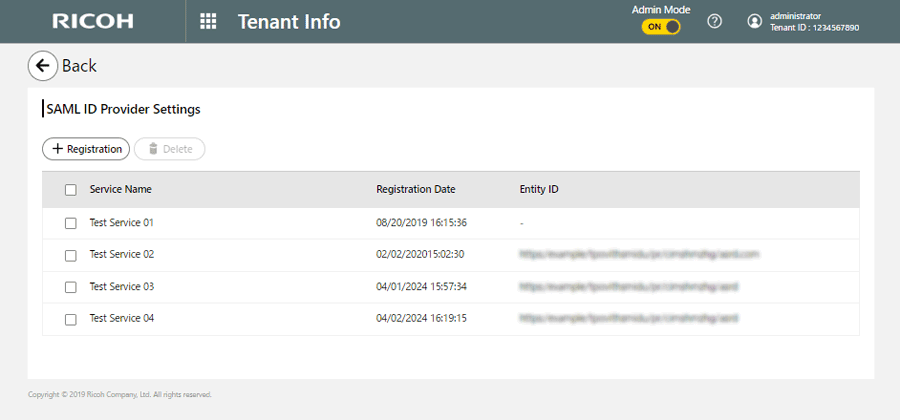
 In the web browser, access "SAML ID Provider Settings" in "External User of RICOH Account" of this site.
 Click [Registration].
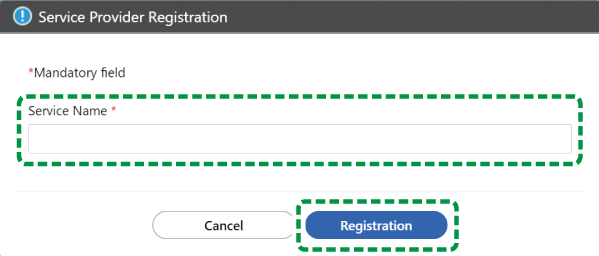
 Enter a service name, and then click [Registration].
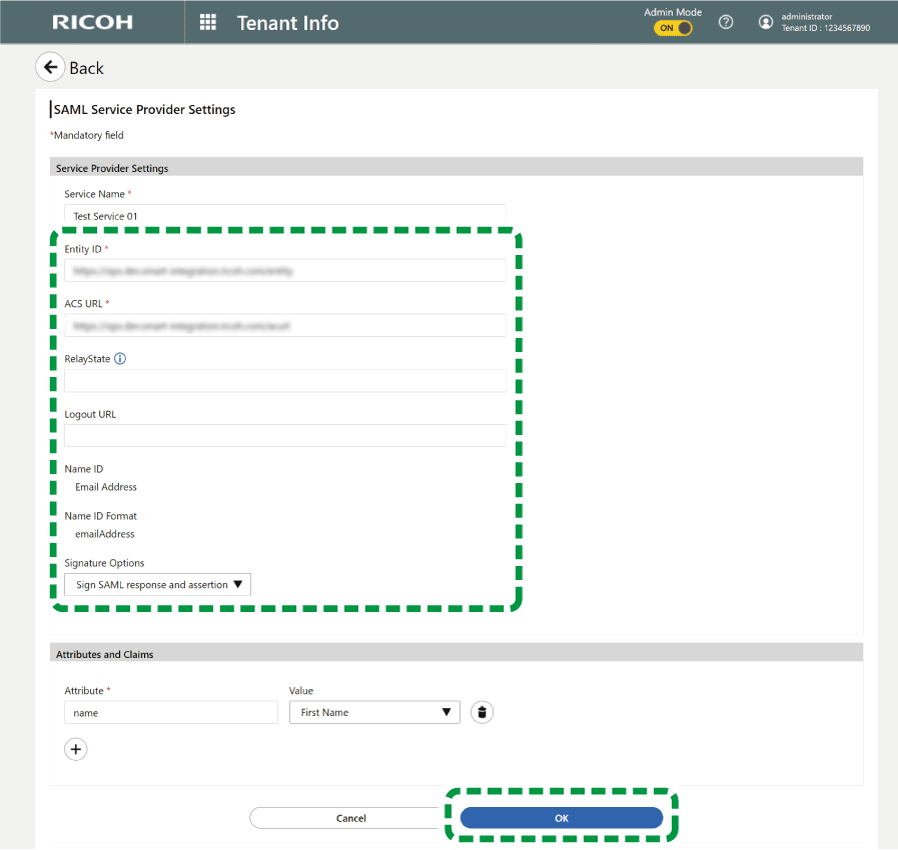
The "SAML Service Provider Settings" section appears.
Registering the ID Provider Information and the Certificate to the Service Provider
If you are asked to provide your ID provider and certificate during registration on the service provider side, perform this procedure. If you can obtain necessary information on the service provider that you need for the next step without this procedure, skip this procedure.
Display the service provider section in another window of the web browser, and then copy the following items from this site and configure them.

Item
Remarks
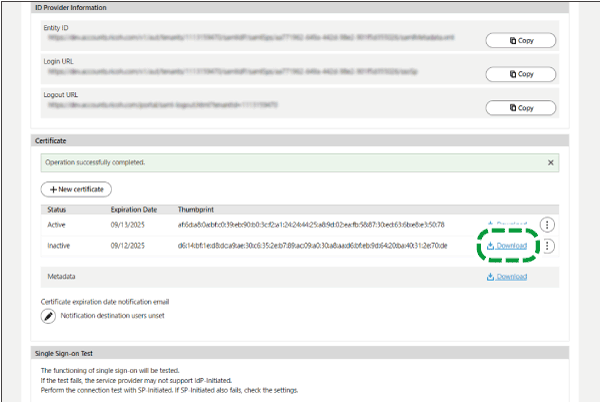
Entity ID
Login URL
Logout URL
Use this to log out from the service provider as well when you log out from the centrally configured sites.
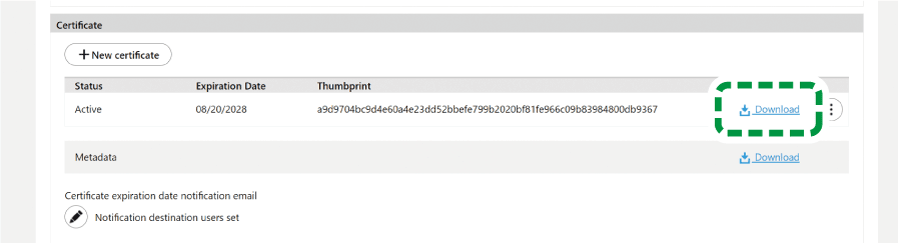
Click [Download] for the certificate for this site.
In the service provider section displayed on the other window, set the certificate.
Registering the Information on the Service Provider
On a different browser window, display the service provider section, and then obtain the following fields that you will configure for this site.
Item
Remarks
Entity ID
Required
ACS URL
Required
RelayState
Use this if you have a URL to redirect to when the authentication on the service provider ends successfully.
Logout URL
Use this to log out from the service provider as well when you log out from this site.
Signature Options
Use this to specify a signature required for verifying SAML assertion that is issued by the ID provider.

The field names vary depending on the service provider.
Enter what you obtained in step 1 to the fields in "SAML Service Provider Settings" at this site, and then click [OK].
Configuring Metadata
Set this item if your service provider has a function for uploading metadata.
If your service provider does not have such a function, register your ID provider information and the certificate to the service provider. If you have already set your ID provider information and the certificate to the service provider, skip this step.
Click [Download] of the "Metadata" field in the "SAML Service Provider Settings" section of this site.
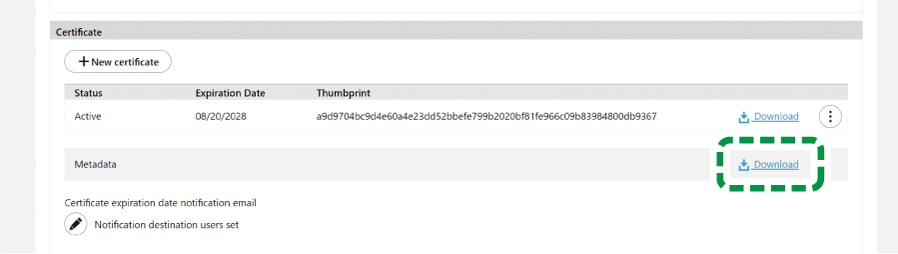
Display the service provider section that you displayed in another window, and then configure metadata.
Testing Single Sign-On
In the service provider section that you displayed in another window, perform any of the following:
Register the user (to the service provider) that uses the same email address as the user that is currently logged in to this site.
Configure the service provider so that users that are logged in to this site will be automatically registered when the users log in to the service provider.
If there are other settings that you need to configure for the service provider, do so on the service provider side.
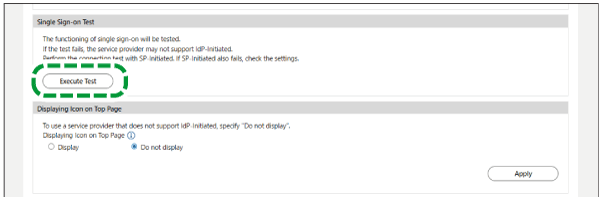
Click [Execute Test] in the "SAML Service Provider Settings" section of this site.

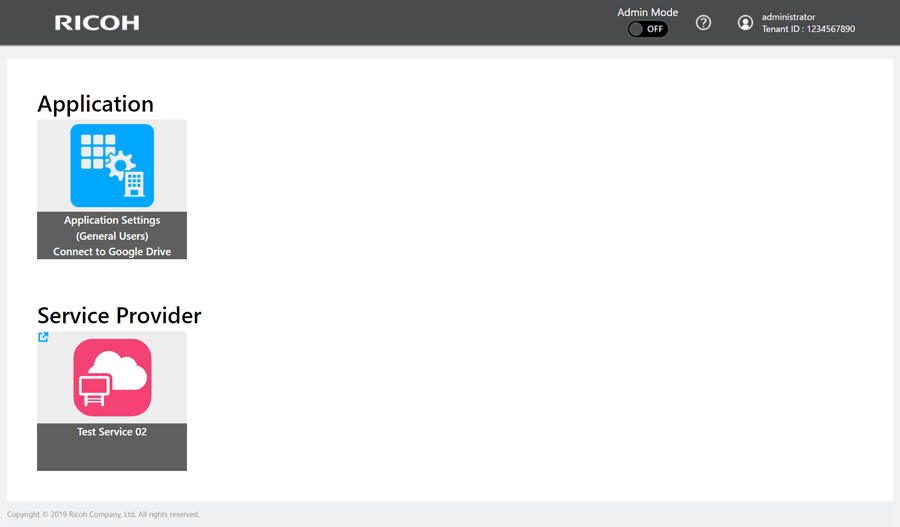
 Unless there is a problem in the settings, the service provider is displayed on a different tab or window, and single sign-on is performed.
When the test fails, the service provider that you are using might not support IdP-initiated single sign-on. In such a case, use SP-initiated single sign-on to test the connection. If the connection test with SP-initiated single sign-on also fails, review the settings.
Displaying the Icon on the Top Page
You can add an icon that enables you to move to the registered service provider section.
In the "SAML Service Provider Settings" section, select [Display], and then click [Apply].
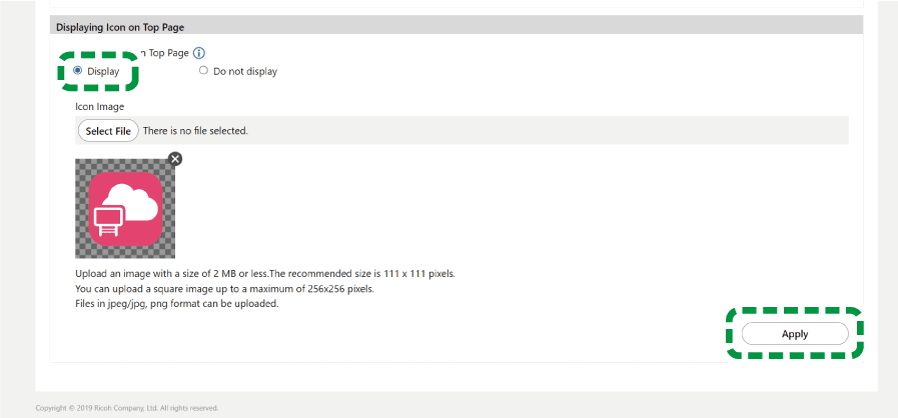
The icon appears on the top page.
If the service provider that you are using does not support IdP-initiated single sign-on, select [Do not Display].
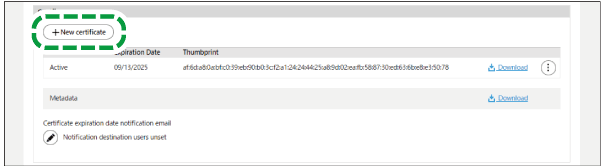
Issuing the Updated Certificate
Perform this setting when the expiration date of the certificate approaches. You do not have to perform this setting when you use SAML Idp for the first time.
If the service provider does not support multiple certificates, step 7 to step 8 of the following operation cannot be performed because an error occurs in single sign-on. In such a case, perform this operation outside the system usage hours.
In the web browser, access "SAML ID Provider Settings" in "External User of RICOH Account" of this site.
On a different screen of your web browser, display the screen for setting service provider certificates.
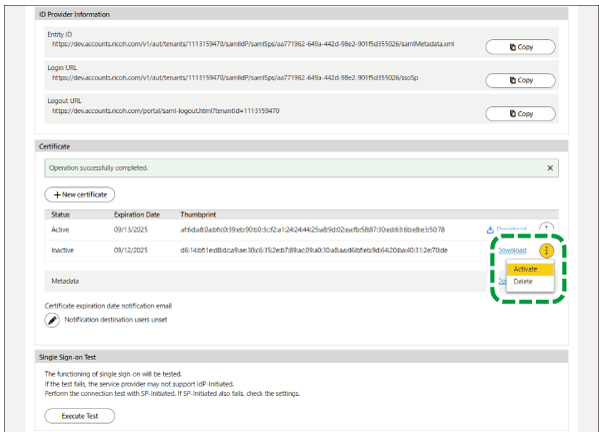
Click the name of a service provider for which you want to update the certificate.
Click [New certificate] in "Certificate".
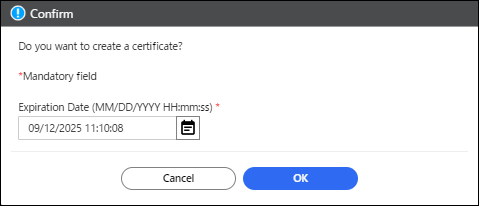
 Specify the expiration date of the certificate, and then click [OK].
The initial value for the expiration date is one year from the time you displayed this dialog. You can specify the expiration date in the range between one day later and five years later.
 Click [Download] for the certificate you issued to download the certificate.
 On a different browser window, display the service provider section, and then configure the certificate downloaded on step 6 to the service provider.
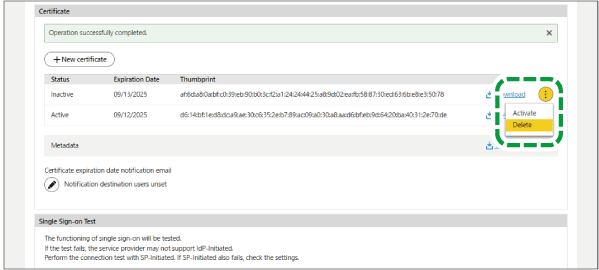
 Return to this site's screen, click the menu button of the newly created certificate, and then select [Active].
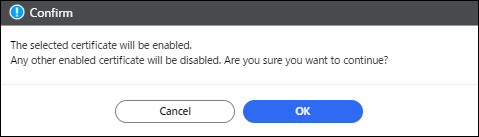
 On a confirmation screen, click [OK].
The certificate status changes to "Active".
 In "Single Sign-on Test", click [Execute Test] to test single sign-on.
If the test ends successfully, the service provider is displayed on another tab or in another window of the web browser, and you can use single sign-on.
 Click the menu button of the old certificate, and then select [Delete].