
How to Configure SAML for admins
Prerequisites
Prepare an administrator account for RICOH Smart Integration.
Supported Features
The Okta SAML integration currently supports the following features:
SP-initiated SSO
IdP-initiated SSO
JIT (Just-In-Time) Provisioning
For more information on the feature, visit the Okta Glossary.
Configuration Steps
1. Configuring SAML settings for the Okta application
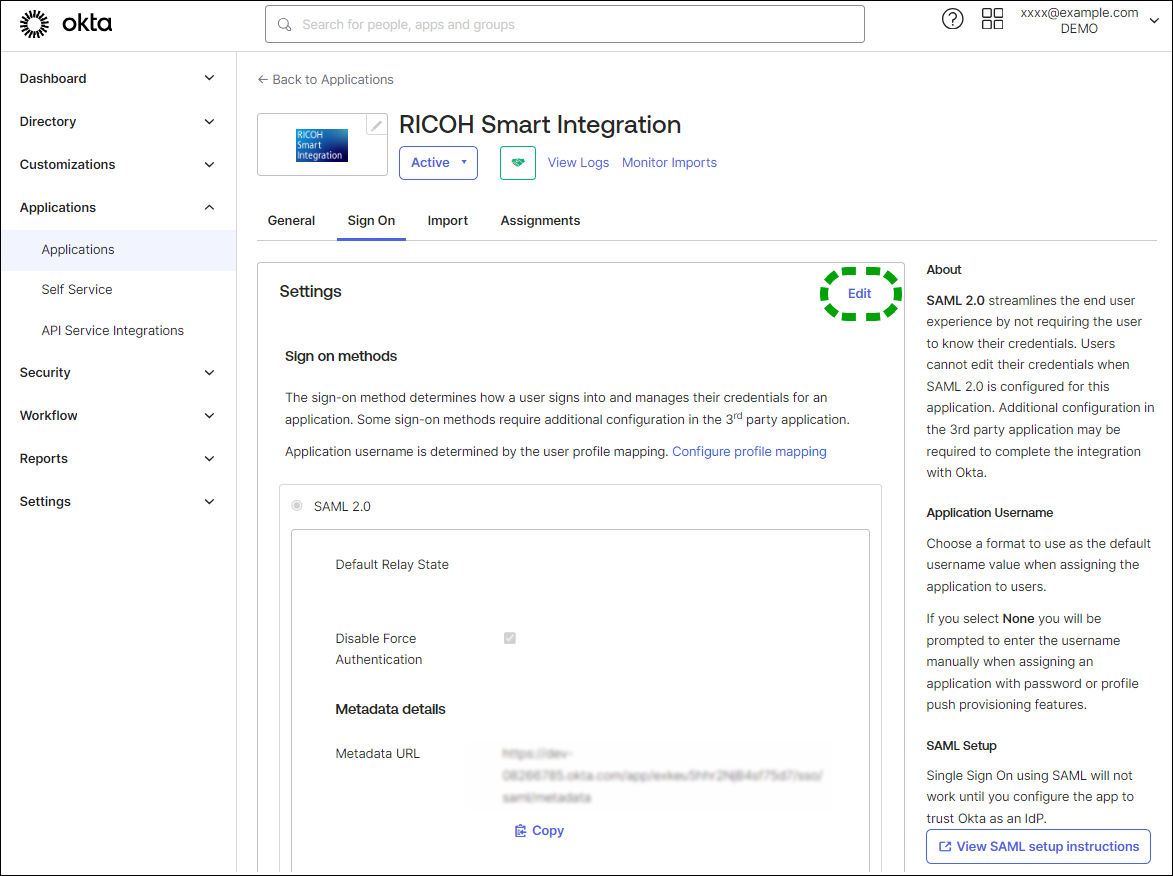
 Navigate to the screen of the application you created, and on the "Sign On" tab, click [Edit].
 Log in to RICOH Smart Integration with an administrator account on a different screen of your web browser.
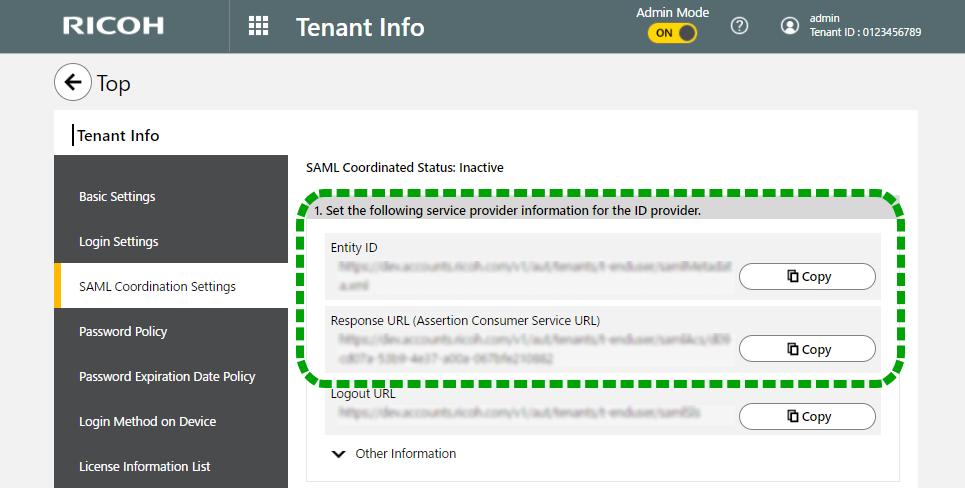
 Go to "Admin Top Page" > "Tenant Info" > "SAML Coordination Settings" and copy [Entity ID] and [Assertion Consumer Service URL].
 Paste [Entity ID] and [Assertion Consumer Service URL].
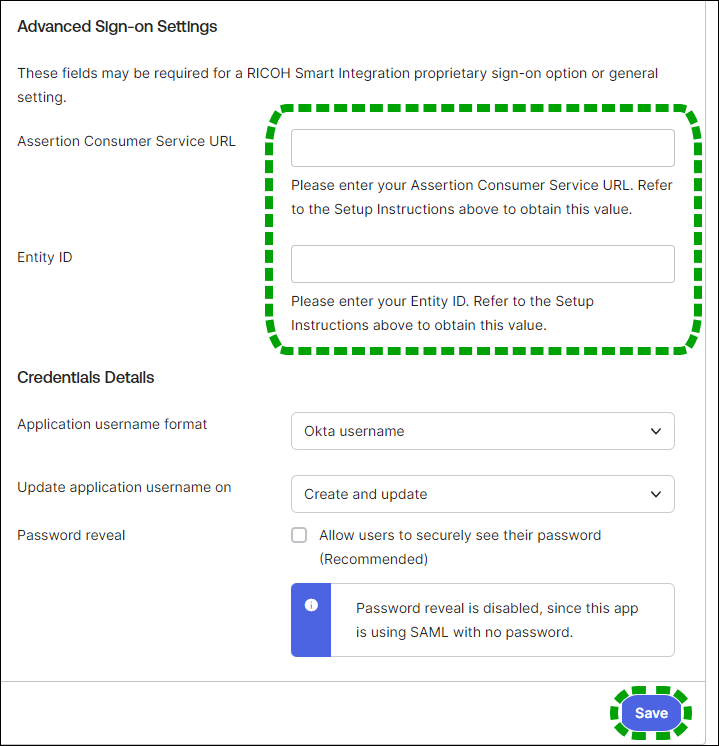
 Click [Save].
2. Configuring SAML xml Metadata at RICOH Smart Integration
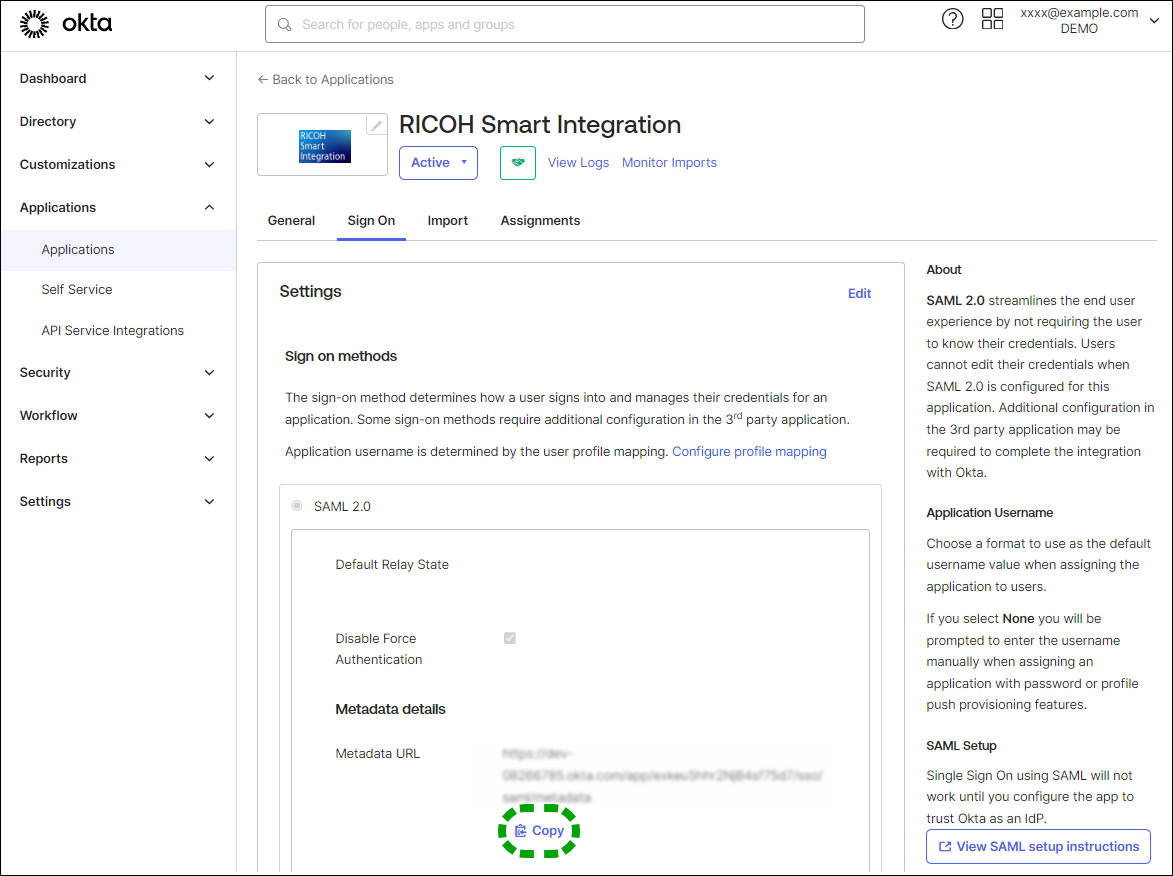
Navigate to the screen of the application you created, and on the "Sign On" tab, click [Copy] for "Metadata URL" to copy the URL.
Paste the copied URL into your web browser's address bar, and then press [Enter].

Right-click anywhere on the screen, and then select [Save As] to download the xml data.
The steps here assume that you are using Chrome and may differ depending on the Web browser you are using.

Log in to RICOH Smart Integration with an administrator account.
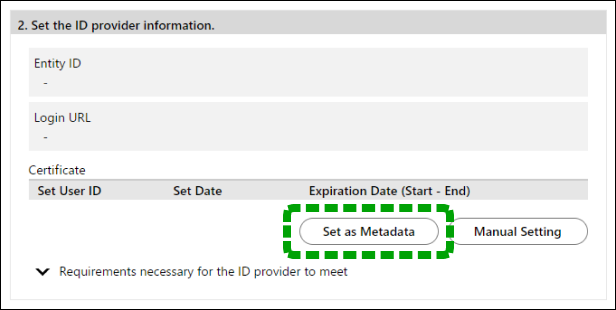
Go to "Admin Top Page" > "Tenant Info" > "SAML Coordination Settings".
 Click [Set as Metadata].
 Click [Select File], and then upload the file downloaded on step 3.
 Click [OK].
3. Assigning Users and Groups
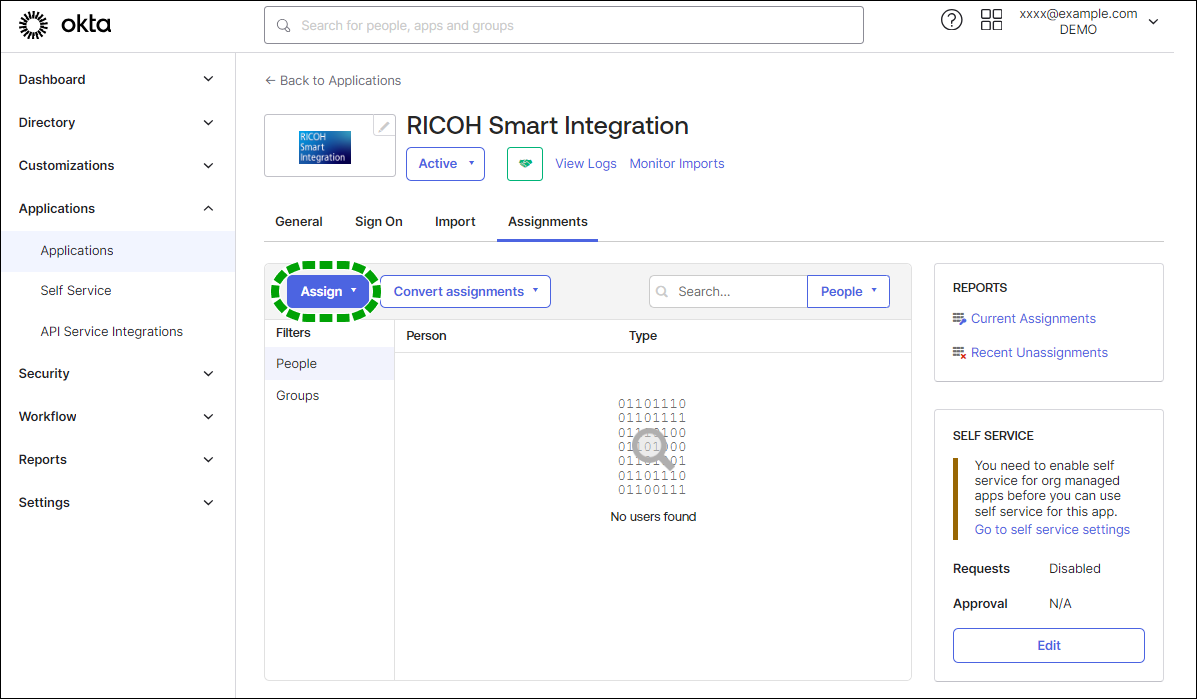
Navigate to the screen of the application you created, and on the "Assignments" tab, click [Assign].
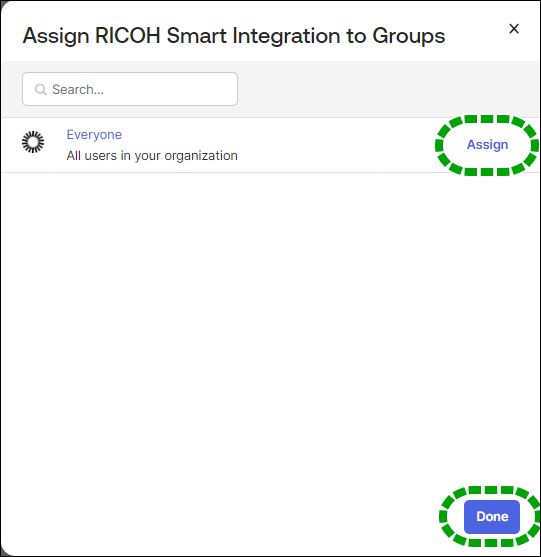
For each user or group that you want to use SAML coordination, click [Assign], and then click [Done].
4. Configuring SAML Coordination Settings at RICOH Smart Integration
Log in to RICOH Smart Integration with an administrator account.
Go to "Admin Top Page" > "Tenant Info" > "SAML Coordination Settings".
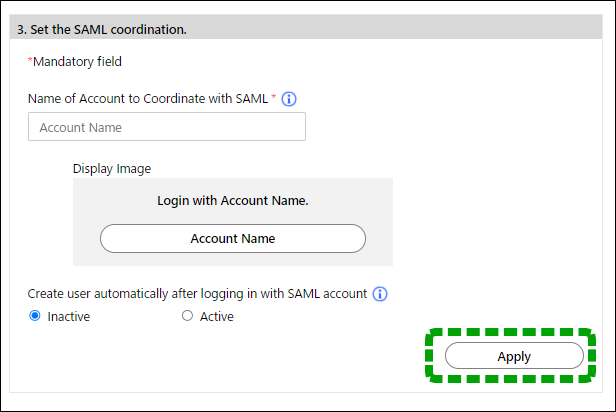
Configure the settings in "3. Set the SAML coordination.", and then click [Apply].
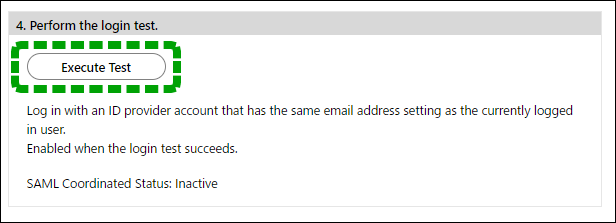
Click [Execute Test] for "4. Perform the login test." to perform a login test with the user assigned to the Okta application.
If the login succeeds, "SAML Coordinated Status: Active" is displayed.
Check "5. Set to use SAML as the login method."
To use SAML for logging in via the web, click [Click here for the settings].
The "Login Settings" screen appears.
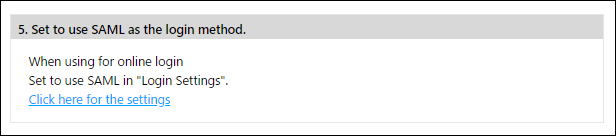
Select [SAML] or [All] from "Login Method to Be Used".
Click [Save].
SP-initiated SSO
Log in with your Okta account.
Notes
The following SAML attributes are supported:
|
Name |
Name format |
Value |
|---|---|---|
|
givenname |
Unspecified |
user.firstName |
|
surname |
Unspecified |
user.lastName |